
Going Intergalactic with Serverless Functions on Netlify
Get started going serverless with Netlify functions and Netlify-CLI for keeping secrets secret
With the Chromebook Linux beta, web development got a whole lot easier.
Today the FedEx man delivered my brand new Pixelbook. So much fun! I got this little tool to attempt to get off of the Mac platform without going full Linux distro. For the most part, I do web development and only need (1) a terminal, (2) an editor, preferably VS Code, and (3) a browser. Since Chrome OS deployed the new Linux beta, all these things are now possible with fewer install headaches than before. These are my adventures in trying to turn it into a dev machine.
Don’t fret that the Linux beta option doesn’t show up in your settings. First, check to see which Chrome OS you are on.
You should then see your current version and whether it is checking for updates. Version 70 was the latest stable for me, though the Linux beta came out in version 69. After updating, Chrome OS will require a restart.
Open your Settings again. Scroll down, and you will find a setting for the Linux beta:
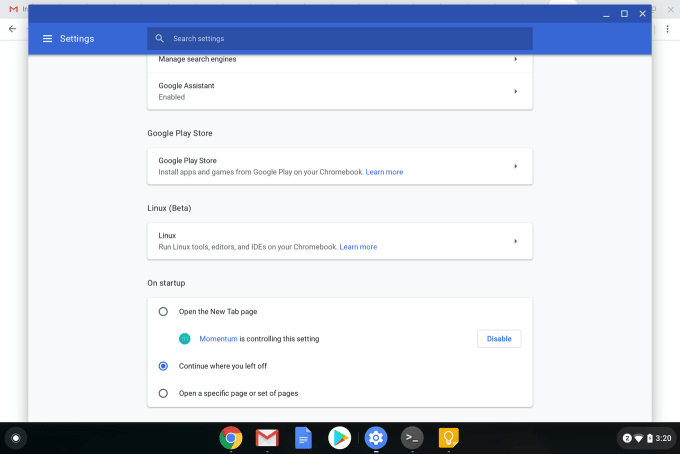
After you turn on the flag, it will download and open a terminal!! 🤯🤯🤯
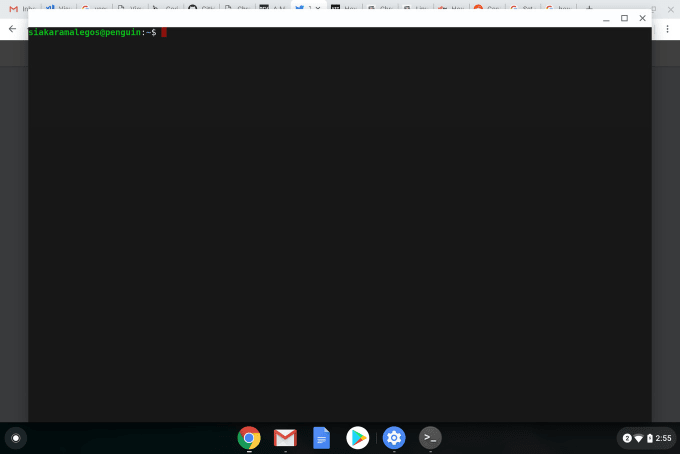
I like tools that make me faster, so I immediately attempted to install zsh and oh-my-zsh, and that’s when I came across my next problem…
It’s a little unclear, but you can update it as follows:
$ sudo supasswd your-username-hereexitBoom! Now you can install and update things in your terminal.
I debated on adding this section, but this article really is about my adventures in setting up my machine, so here goes. Oh My Zsh is totally an easy cop-out I’ve used for setting up my terminal on every machine:
It gives me a custom terminal prompt that I like and Git aliases. You just need to install Zsh and then Oh My Zsh:
$ apt install zsh
$ sh -c "$(curl -fsSL https://raw.githubusercontent.com/robbyrussell/oh-my-zsh/master/tools/install.sh)"
This worked like a breeze once I knew my password. 🤦
By now you should know that I like things that make my life easy. As I type these words, I have not yet attempted to install VS Code. I hope I don’t have to delete this section. Hold on while I Google some stuff…
Success! Okay, it looks like we might not have access to the file system for files downloaded using Chrome. So instead, we need to download the .deb installer using curl and then install it:
$ curl -L https://go.microsoft.com/fwlink/\?LinkID\=760868 > code.deb
$ sudo apt-get install ./code.deb
For the final test, see if it runs:
$ code .Success! 🙌
Thanks to this Reddit post for the VS Code installation clues. It suggests a few other libs that they had to install because of bugs, but I have not come across any bugs yet. I’ll update this post if I come across those bugs later.
I chose to install Node and NPM via Node Version Manager. Install via curl:
$ curl -o- https://raw.githubusercontent.com/creationix/nvm/v0.33.11/install.sh | bashThen, add these 3 lines to your .zshrc (or .bashrc):
export NVM_DIR="$HOME/.nvm"
[ -s "$NVM_DIR/nvm.sh" ] && \. "$NVM_DIR/nvm.sh"
[ -s "$NVM_DIR/bash_completion" ] && \. "$NVM_DIR/bash_completion"
Then, restart your terminal or type source .zshrc or source .bashrc to have it load the updated run commands.
Check that it’s working with nvm -v, then you can install Node with nvm install node for the latest release of Node (and NPM).
Special thanks to Yulan Lin for all her help with setting up my Pixelbook!
I make websites faster, smarter, and easier to grow.
If you want someone who’s creative and precise, deeply reliable, and not afraid to tell you what’s what to get you to the next level—I’m your partner.
Get started going serverless with Netlify functions and Netlify-CLI for keeping secrets secret

Add Prettier with a pre-commit hook and dedicate one commit to a full reformat

It's really easy.
If you liked this article and think others should read it, please share it.
 2
2
 4
4
Apple fixed the keyboards; we’re back on the band wagon source
Was this a pet project? Or are you using this as your full-time dev machine? source
I got it as a backup machine. It's still overall easier to use a MBP, but it's great for when the keyboard breaks 😂 source
I don't think there was a specific issue no. Just a general query! source
These are webmentions via the IndieWeb and webmention.io. Mention this post from your site: